Guide
Using the Ink printer
Send anything you can print for signature, straight from the app it's in. Here's how to set it up and send your first document.
Install Ink
Your IT provider usually installs Ink for you. If you're setting up your own computer, get the installer from the Download page and open it.
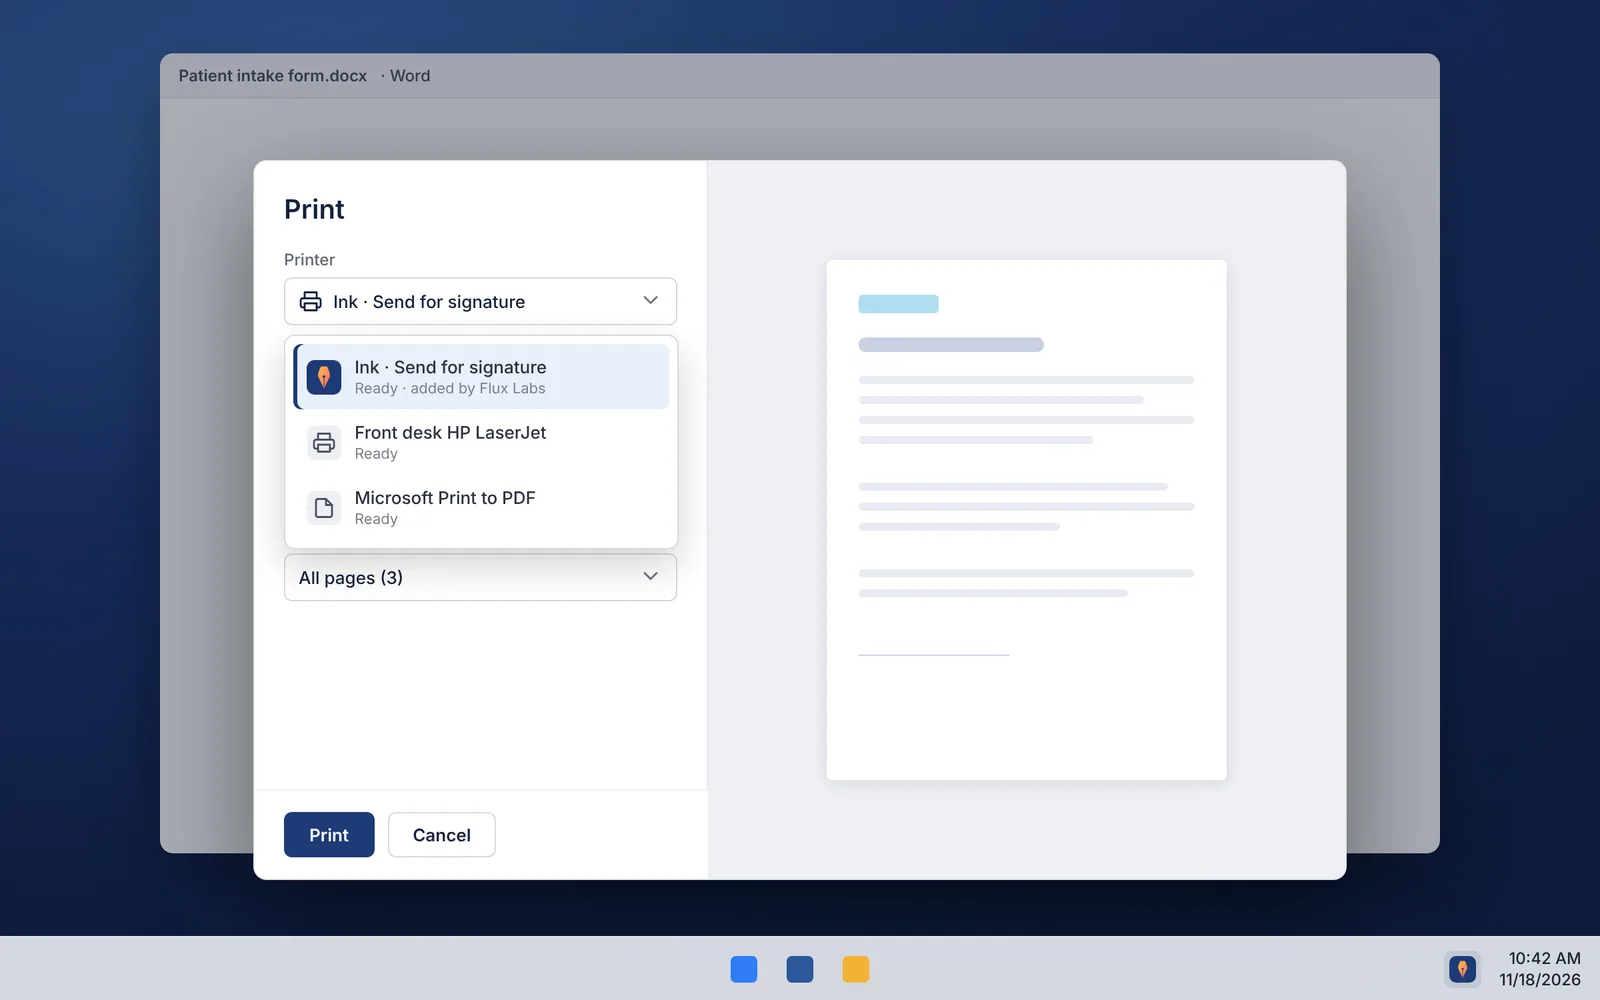
- Windows: run Ink-Windows.msi. It adds a printer called Ink · Send for signature and puts the Ink icon in the tray, next to the clock.
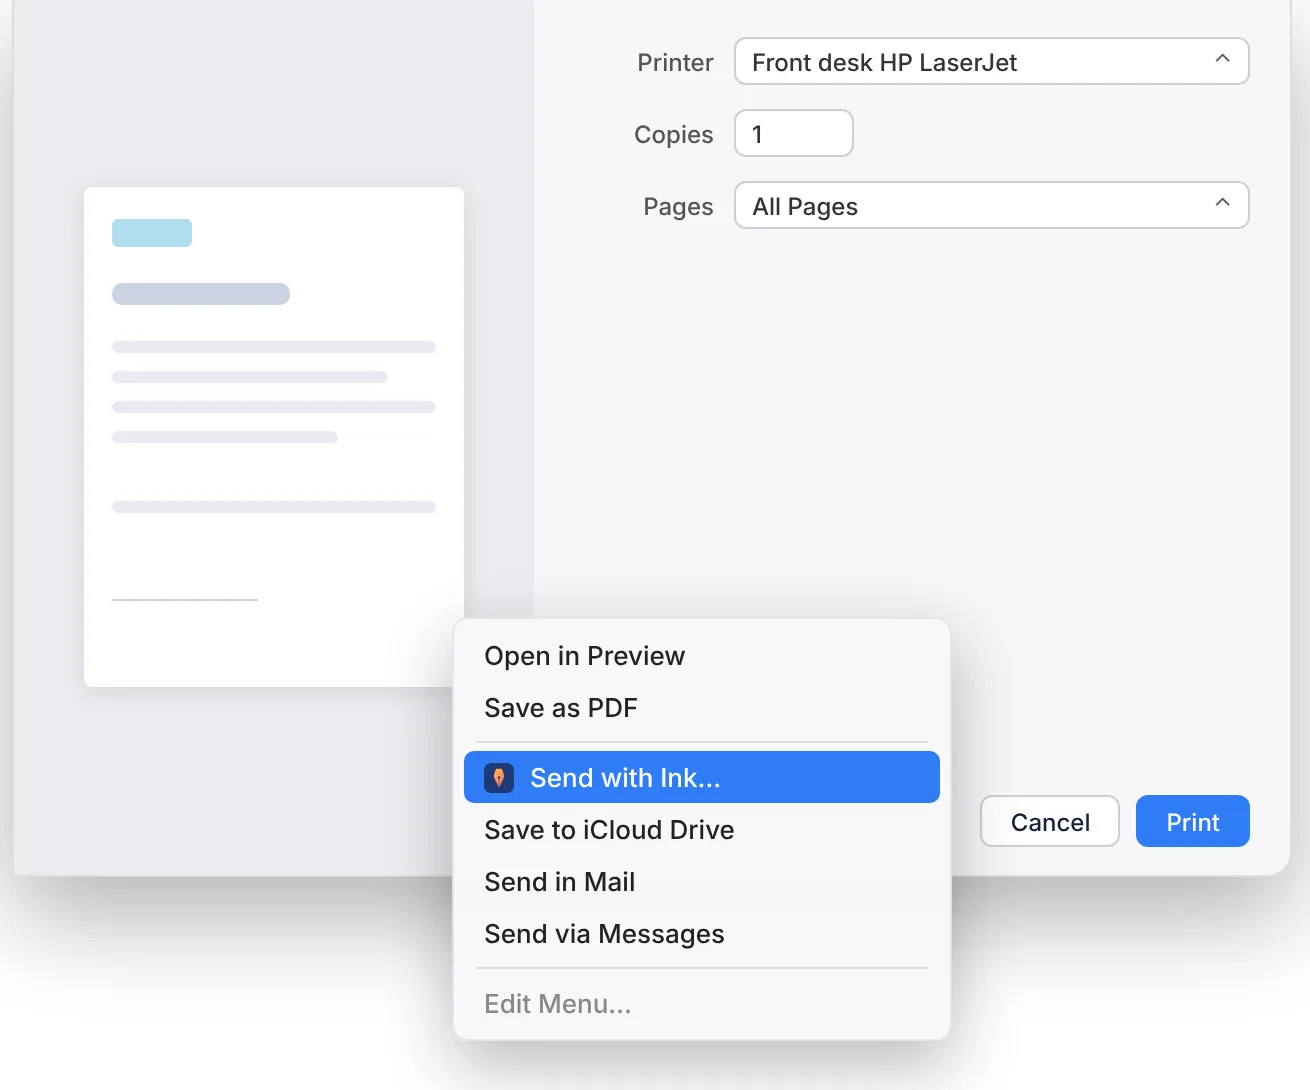
- Mac: open Ink-Mac.dmg and double-click Install Ink. It adds the same Ink · Send for signature printer, plus Send with Ink… in the PDF menu, and puts the Ink icon in the menu bar.
Ink starts by itself each time you sign in to your computer.
Sign in once
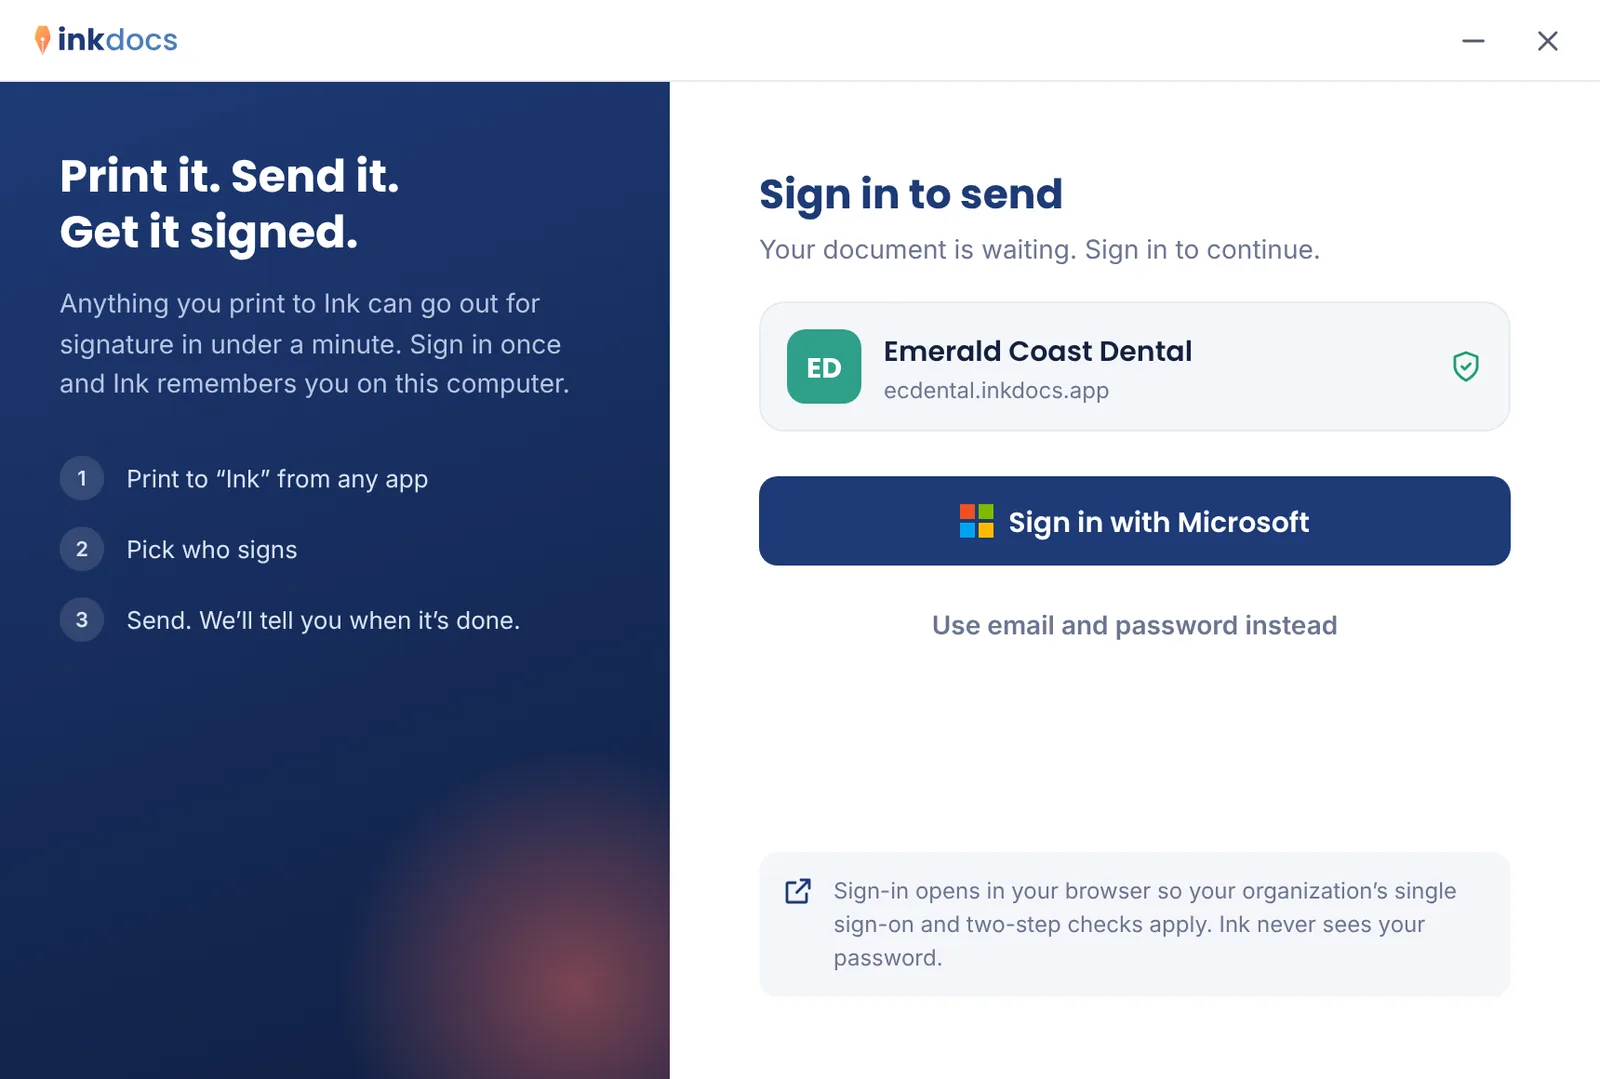
The first time you print to Ink, it asks you to sign in. Choose Sign in with Microsoft, or Use email and password instead. Your browser opens your organization's own Ink sign-in page, so single sign-on and two-step checks work as usual, and Ink never sees your password.
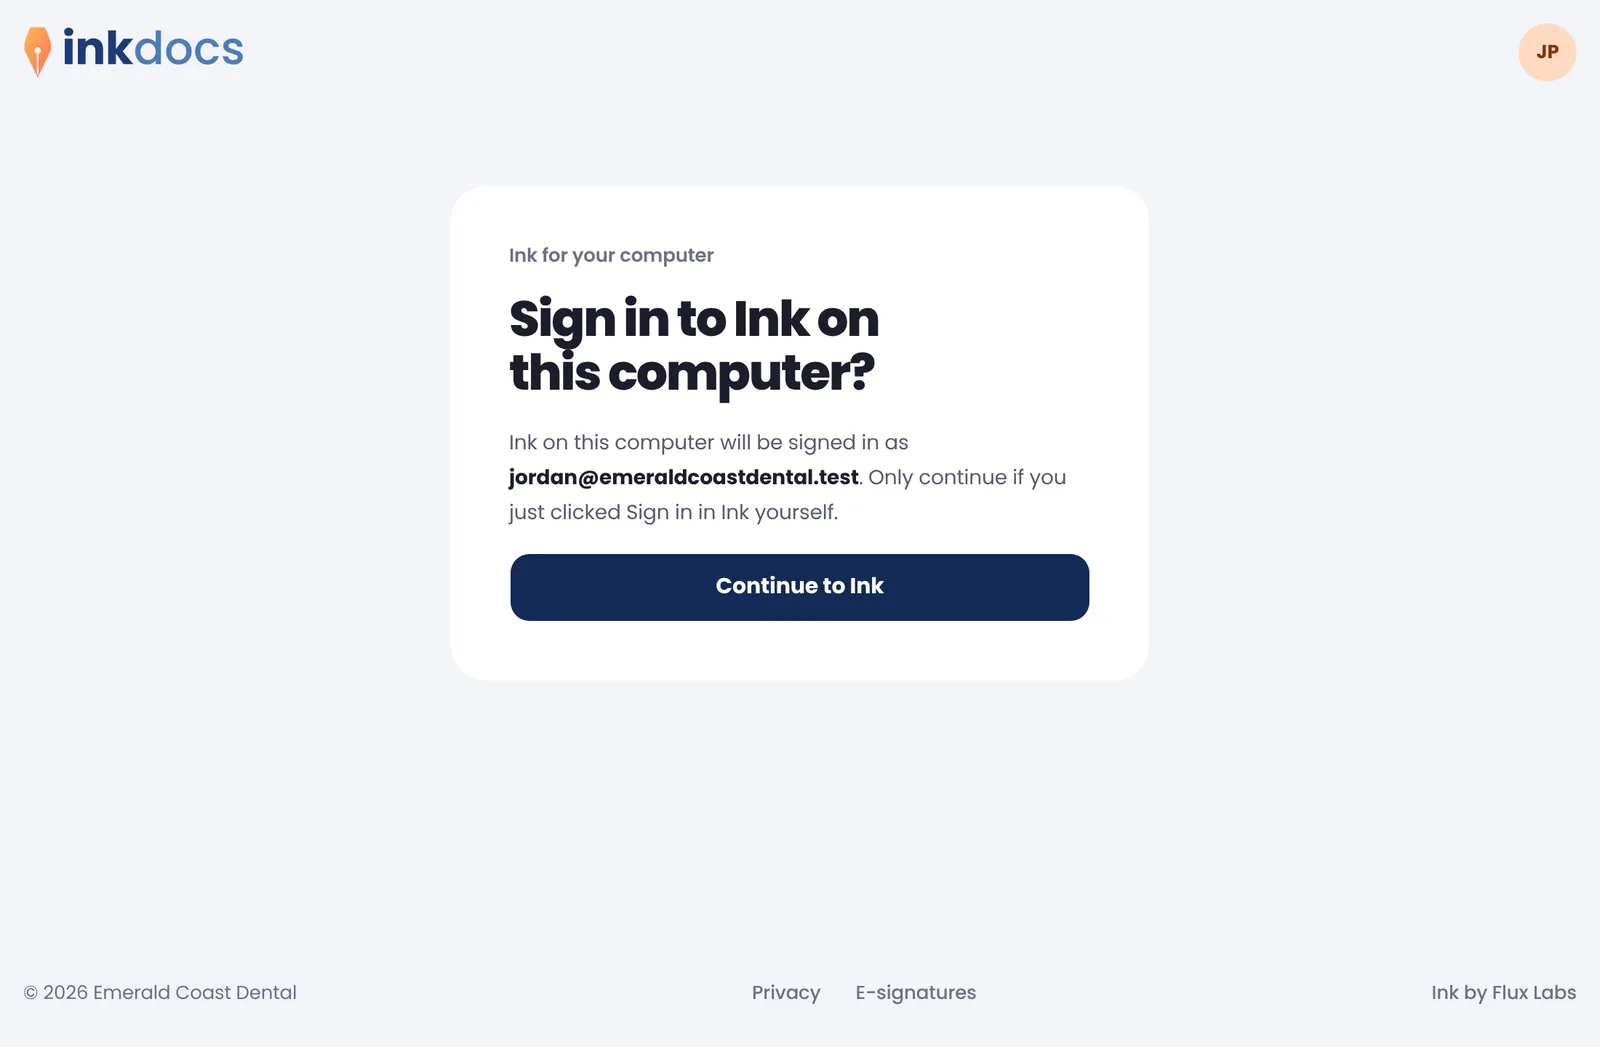
When the browser asks Sign in to Ink on this computer?, check it's your account and choose Continue to Ink. You can close the browser tab. Ink remembers you on this computer until you sign out.
Print to Ink
Open the document in any app (Word, a PDF, your practice or accounting software) and print it.
- Windows: pick the Ink · Send for signature printer and choose Print.
- Mac: open the PDF menu at the bottom of the print dialog and choose Send with Ink…
Nothing comes out of a printer. The Ink pop-up opens with your document in it.
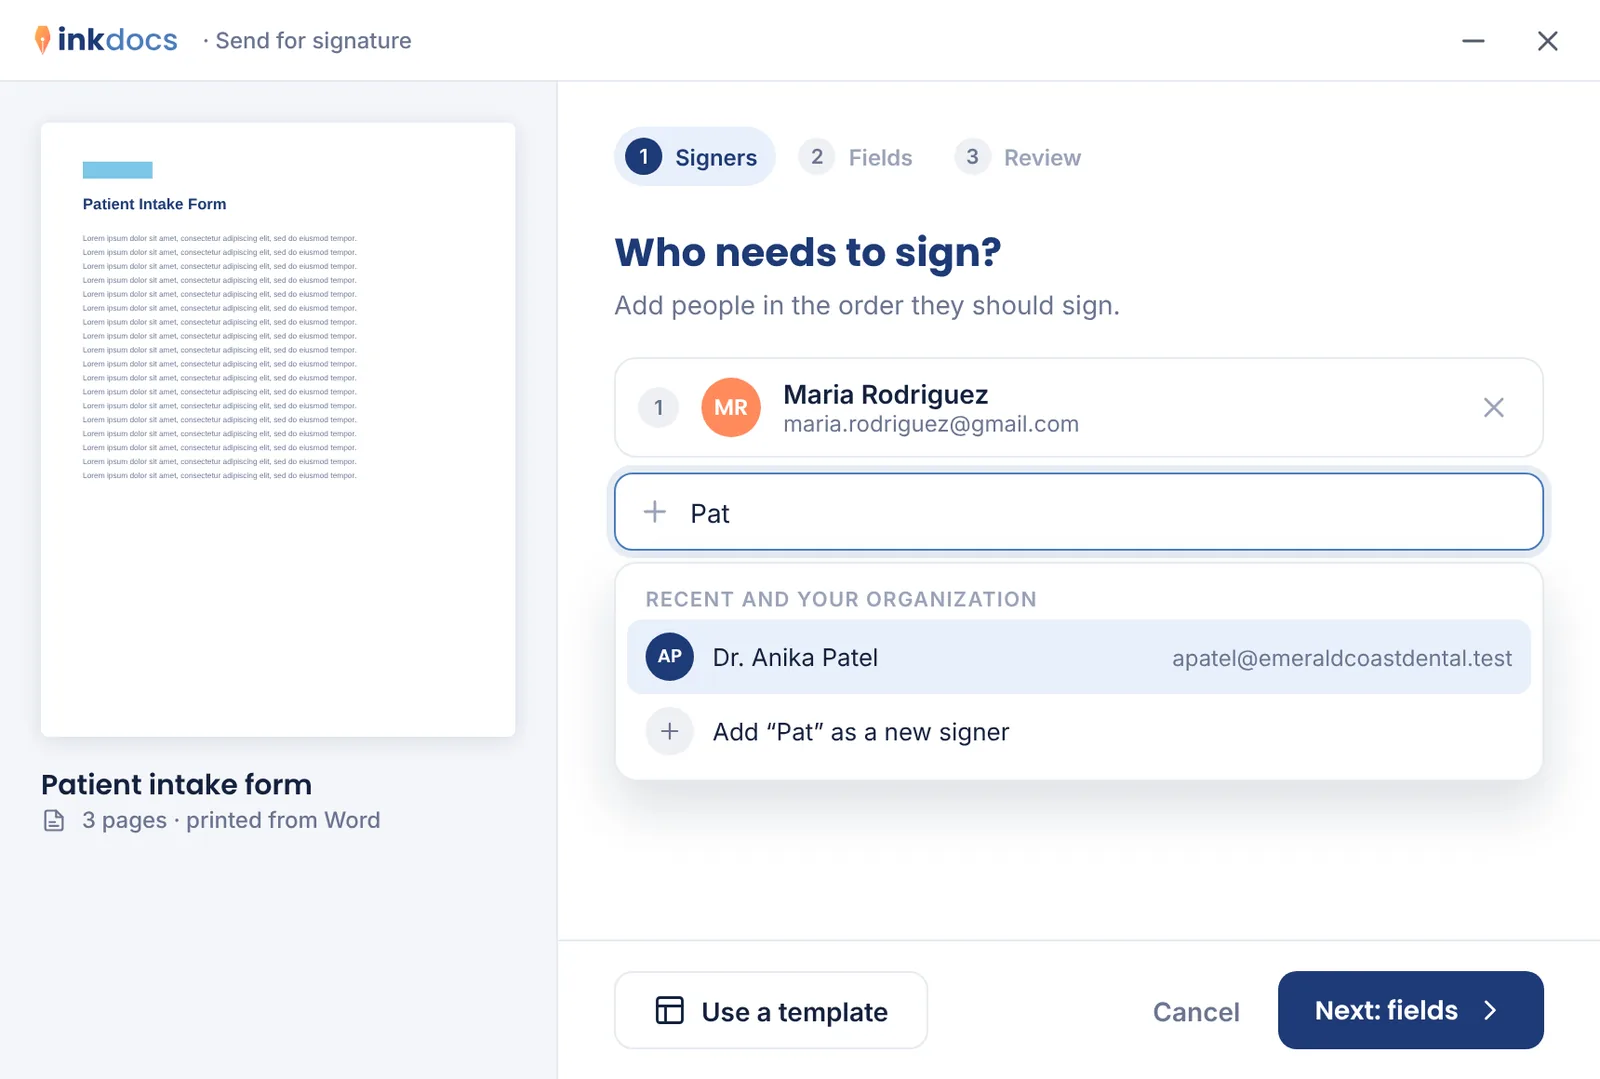
Choose who signs
Type a name or email address. Ink suggests people you've sent to before and people in your organization. Add each person in the order they should sign. Drag them to change the order, and turn on I also need to sign to add yourself last.
Send the same form often? Use a template fills in the roles and fields you saved in Ink on the web.
Choose where they sign
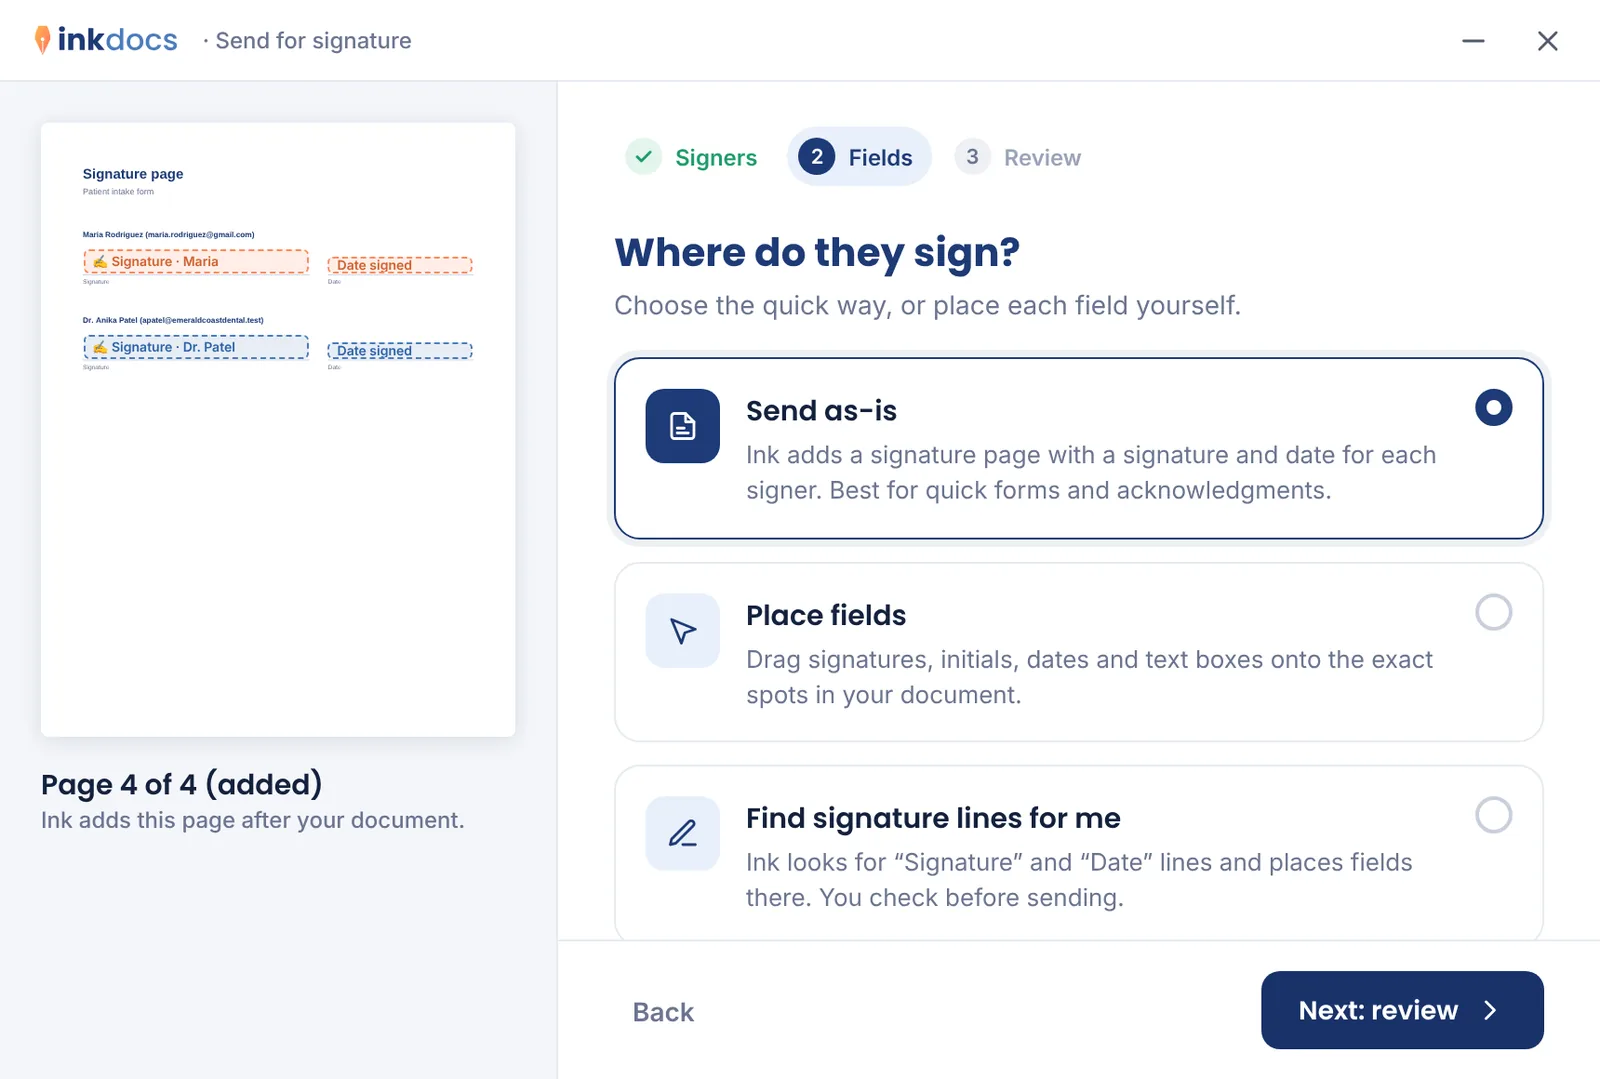
Pick how people sign:
- Send as-is adds a signature page at the end with a signature and date line for each person. Best for quick forms and acknowledgments.
- Find signature lines for me looks for “Signature” and “Date” lines in your document and puts fields on them. You check them before sending.
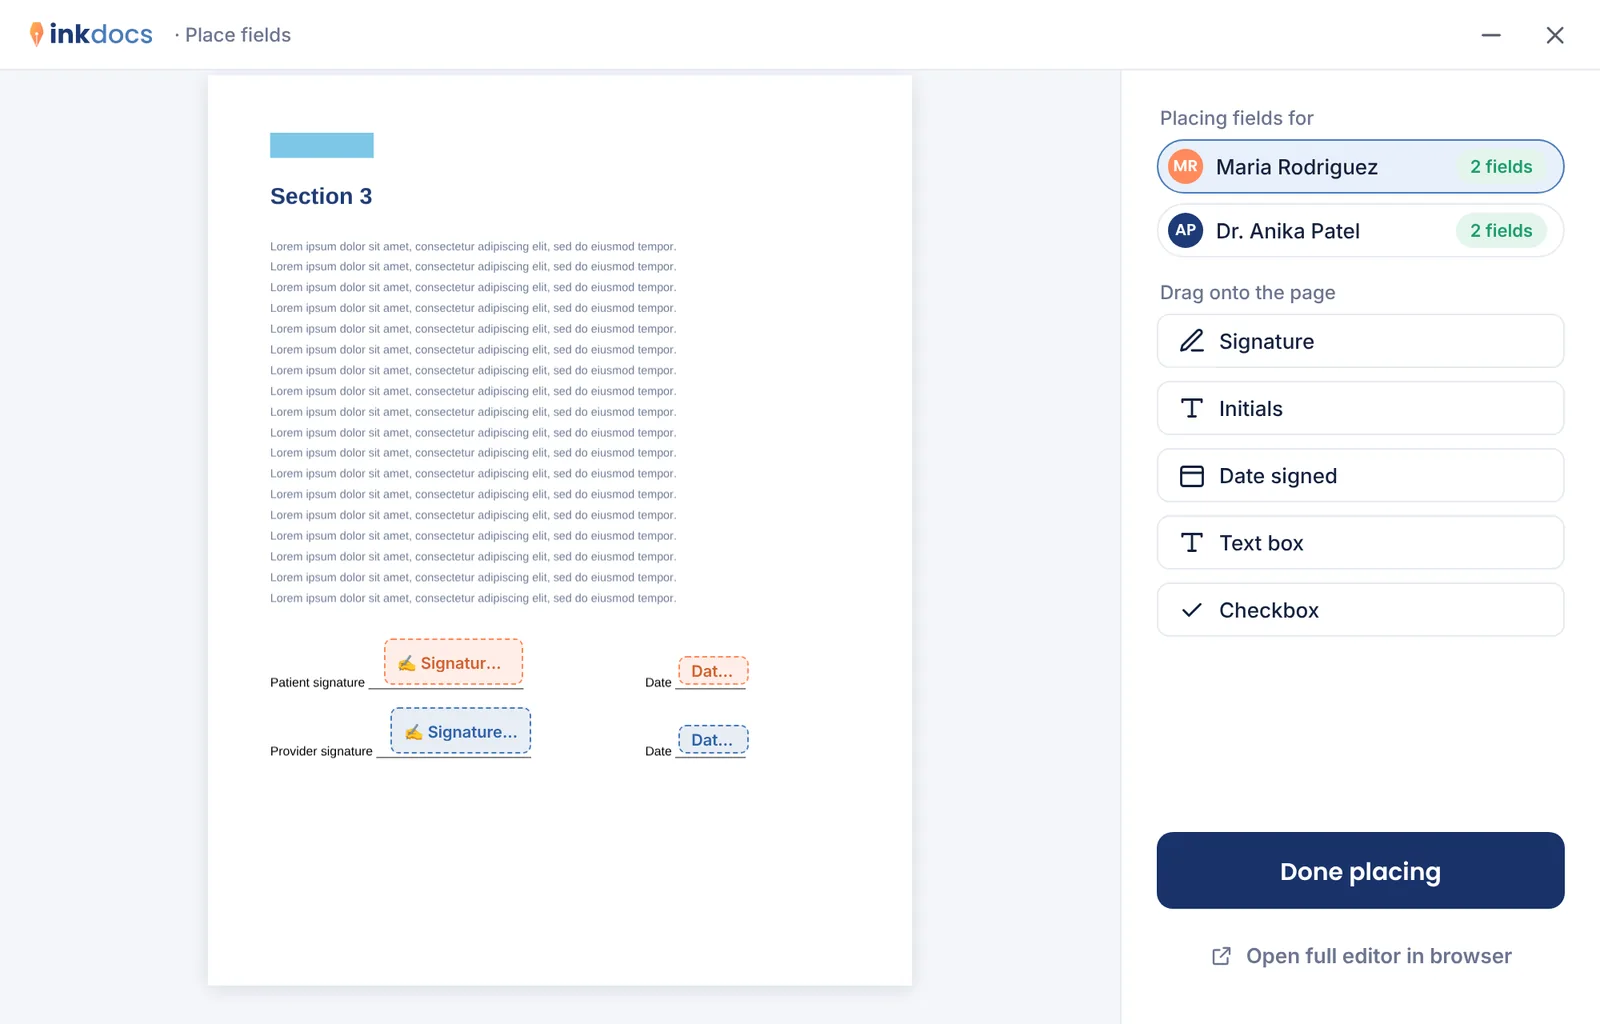
- Place fields lets you drag signatures, initials, dates, text boxes and checkboxes onto the exact spots.
Review and send
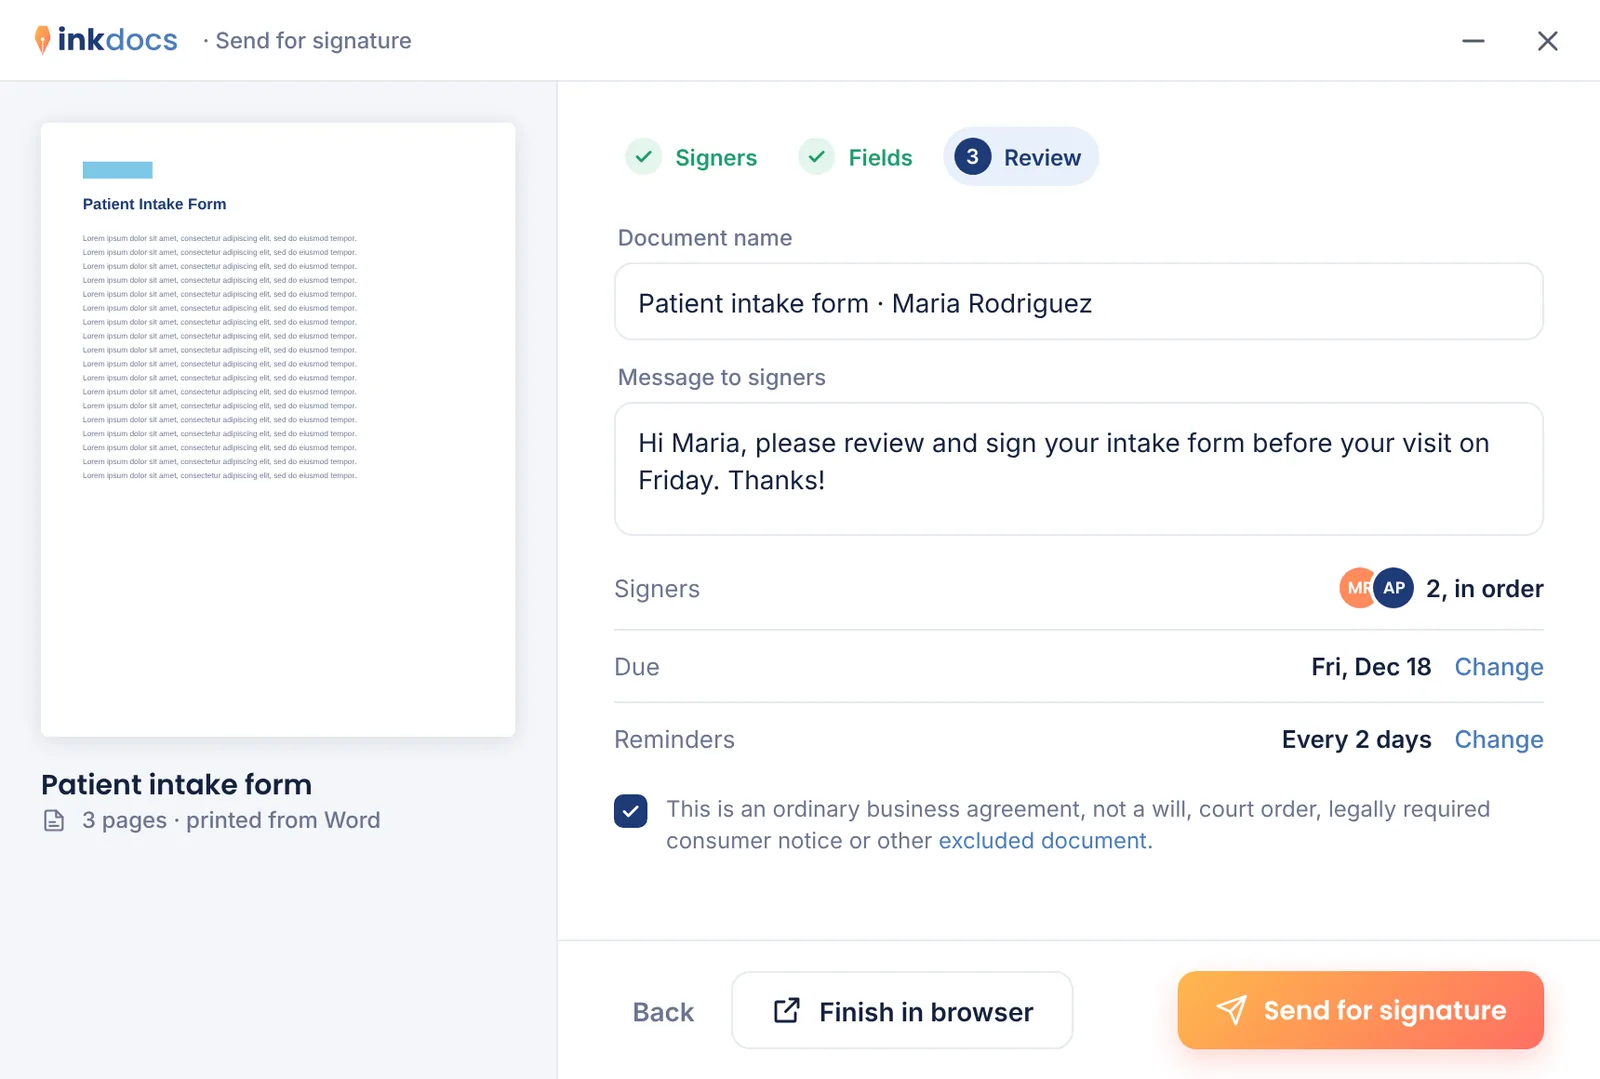
Check the document's name, add a short message for the people signing, and set the due date and reminders if you want something other than your organization's defaults. Then choose Send for signature.
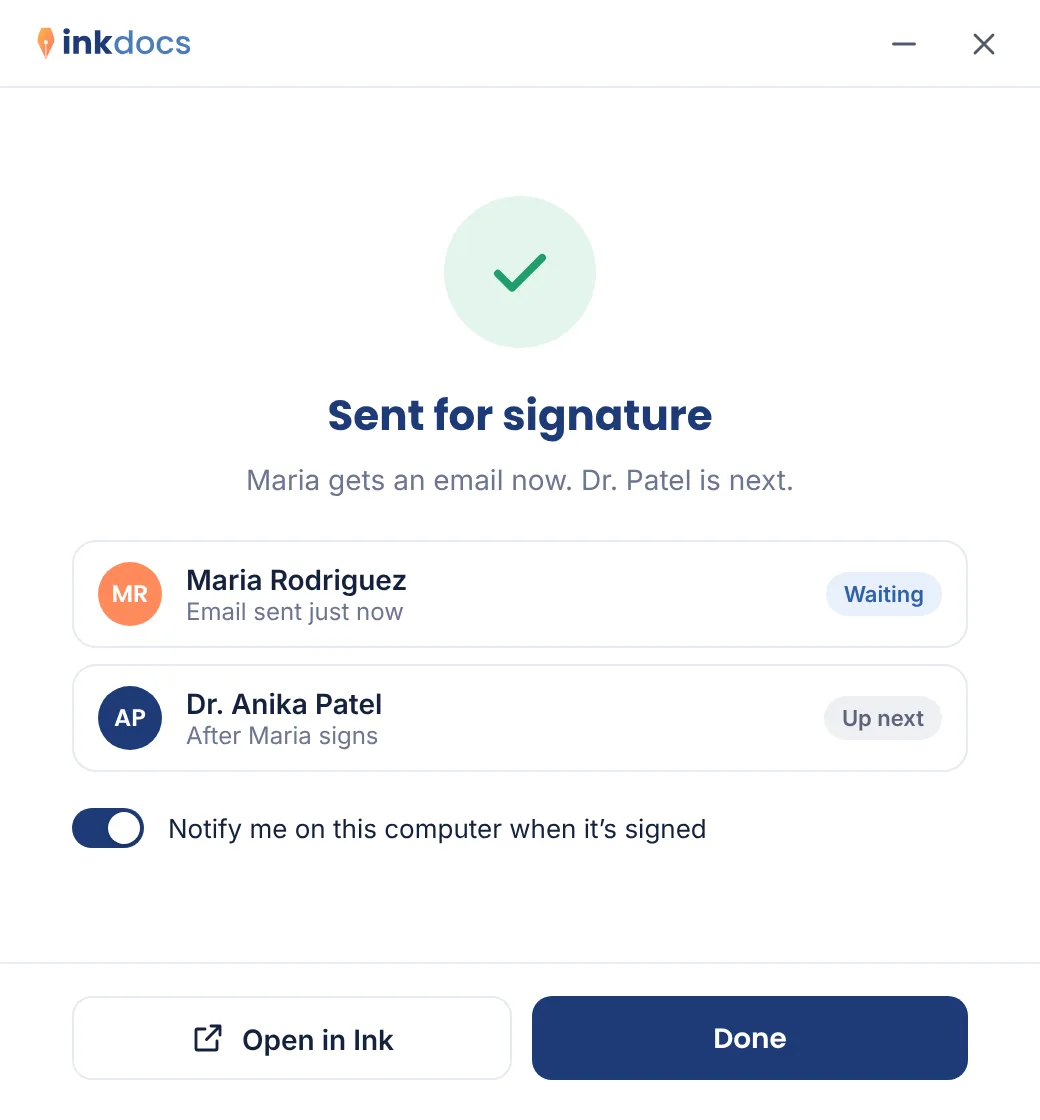
The first person gets an email straight away; the next gets theirs when the one before signs. Leave Notify me on this computer when it's signed on to hear about it.
Follow it from the tray
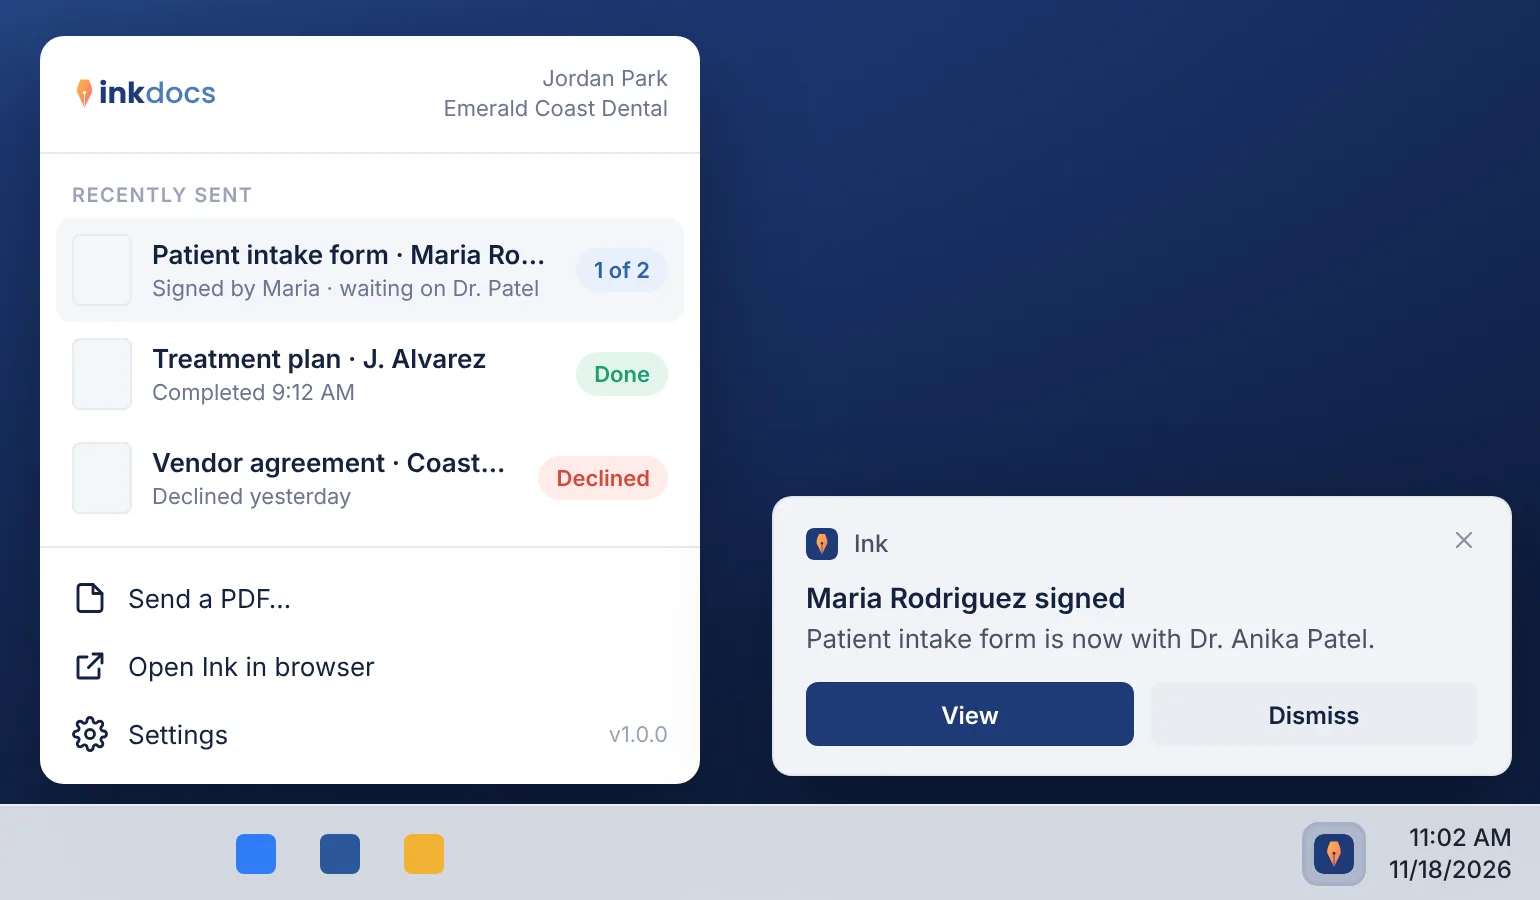
Click the Ink icon in the tray (Windows) or the menu bar (Mac) to see what you sent recently and who it's waiting on. From there you can also send a PDF that's already on your computer, open Ink in your browser, and change settings such as notifications and starting Ink when you sign in.
When someone signs, Ink lets you know. Choose View to open the document in Ink.
For IT: deploy it
Install Ink per computer, silently, with one of your organization's install keys and its Ink address. People then see only your organization's sign-in. Leave the address out and they sign in with their work email at sign.inkdocs.app instead.
Make an install key
In Ink, an administrator opens Settings, goes to Ink printer and chooses Make install key, with how long it should work: 1, 7, 30 or 90 days. Copy the key when it's shown, because it isn't shown again. The page also gives you the install commands with the key already in them.
Ink trades the key for the computer's own credential the first time someone signs in, so the key only has to work for your rollout. Once it runs out, nobody can set up another printer with it, and computers already set up keep working. Without a key, or with another organization's, nobody can sign in on the computer. Every computer set up shows under Computers in the same place, where you can remove one, which also signs out whoever was signed in there.
Windows with your RMM
Upload Ink-Windows.msi and run it as the system account:
msiexec /i Ink-Windows.msi /qn INSTALLKEY=INK-XXXXX-XXXXX-XXXXX-XXXXX-XXXXX ORGURL=yourorg.inkdocs.app ORGNAME="Your Organization"ORGNAME is shown on the sign-in screen before anyone has signed in. Upgrades keep the settings; uninstalling removes the printer.
Windows with Intune
Add a Windows app (Win32) or Line-of-business app with the MSI, set the install context to Device, and use the same command line arguments:
/qn INSTALLKEY=INK-XXXXX-XXXXX-XXXXX-XXXXX-XXXXX ORGURL=yourorg.inkdocs.app ORGNAME="Your Organization"Mac with an RMM script or MDM
Set the install key and address, then install the package. An MDM can set the same keys with a configuration profile for the app.inkdocs.printer domain.
sudo defaults write /Library/Preferences/app.inkdocs.printer InstallKey INK-XXXXX-XXXXX-XXXXX-XXXXX-XXXXX
sudo defaults write /Library/Preferences/app.inkdocs.printer OrgUrl yourorg.inkdocs.app
sudo defaults write /Library/Preferences/app.inkdocs.printer OrgName "Your Organization"
sudo installer -pkg Ink-Mac.pkg -target /
Shared computers
On a front-desk PC or a Remote Desktop server, each person who signs in runs their own Ink and signs in as themselves. A print goes to the Ink of whoever printed it.
If something's not right
- I don't see the Ink printer
- Make sure Ink is installed and running: look for the Ink icon in the tray or menu bar. On Windows, the printer is added when Ink is installed for the whole computer; ask your IT provider to reinstall it if the printer is missing.
- Ink says this computer isn't set up
- Ink was installed without an install key, or with one that had run out or was revoked before Ink first opened. Ask your IT provider to make a new key in Ink's settings and reinstall Ink with it. If an administrator removed the computer, it needs a new key too.
- Sign-in didn't come back to Ink
- Finish signing in in your browser and choose Continue to Ink. If you closed that tab, click the Waiting for your browser button in the pop-up to stop, then sign in again.
- My document is too large
- The printer sends documents up to 4 MB. For a bigger file, save it as a PDF and upload it in Ink on the web.
- Windows says it protected my PC
- Choose More info, then Run anyway. Installers from your IT provider normally go on without this.
- Someone else needs to use Ink on this computer
- Open the Ink menu, choose Settings, then Sign out. The next print asks you to sign in again.
Still stuck? Contact Flux Labs support.